Saturday 27 April 2013

Spring Wreath How-To

A few weeks ago I picked one of my Pinterest craft ideas and pulled it off.  It had been teasing us with spring and I was getting spring fever, so I decided to go to Michaels and get stuff to MAKE it feel like spring.  I fashioned this wreath and loved it.

A couple weeks later, the supplies to make it were on sale, super cheap - more than 50% off!  I thought, I want to make more, maybe I could sell them.  So I put up an ad on a Facebook Swap and Buy and got 6 orders!  Boy did that affirm me.  But then I was panicked - what if I get too many orders and can't get the supplies for as cheap as I did?  So after some unnecessary anxiety, I decided that I won't launch a business (hey isn't every stay-at-home-mom trying to make a buck from home?)  But rather I would write a tutorial about the process so that others may enjoy the beauty.  It truly is simple and I figured it out by looking at a picture, but there are a few details that would benefit being explained so you don't have to guess like I did.

First you go to Michaels and buy the following:
A Grapevine Wreath - 18 inches - retails $4.99
A can of Design Master Spray Paint (turquoise is what I used) - retails $12.99 - Krylon is cheaper and fine but more oily and doesn't coat as nicely
Flowers of your choice - 2-3 bunches - retails around $3-12
3 Gerber daisies - patterned ones retail for $2.99 each
Ribbon - retails $4.89 for a 7 yard roll
Card-stock - I had at home

Other tools:
Modge Podge
Hot Glue Gun
Hole Punch
Wire cutters
Needle nose pliers
Scissors

Of course all these things go on sale and can be purchased with coupons - so I encourage you to maximize the coupons and sales and make it for much cheaper.

Pick a nice day and spray the wreath outside.  I start with one coat, leave it 15 minutes and spray the other side.  Leave it another 15 minutes or so and spray the front side again.  I try not to let any brown show and it may need a third coat, but I just do one coat on the back.

Meanwhile you can work on your tags.  You can, for ease, print off a design and put it on card-stock, but I like the layered effect.

I print of my initial on card-stock using Georgia font in size 200.  I set the font settings to Bold, with a grey outline and no fill.

I carefully cut it out and use an exacto knife if there is an inner circle.

I make 2 circles out of card stock using an item from around the house to get the shape.  I also use a heavier cardboard to make a backing so it doesn't curl.  then I Modge Podge everything together and let dry.

I use a hold punch to make a bunch of dots and glue them around the perimeter of the first circle.  This seems finicky but I love the effect.  After it is dry I put another layer of Modge Podge on top to seal it and give it a nice gloss.

When the wreath is dry (I like to leave it outside for a day if possible so it doesn't stink like spray paint.)
Get your flowers ready and plug in a hot glue gun.  Also get out the needle nose pliers and wire cutters.

I push all the foliage back from the flower stems and snip off the individual flowers leaving a few inches of stem to work with.  I put them through the wreath and then use the needle nose pliers to twist and work the stems into the wreath to secure them.  Some flowers may come off the stem in which case they can be hot glued on.

I add the larger gerber daisy accents last and pop them right off the stem.  I use a large dollop of hot glue and hold them in place.

Finally I cut about 4 feet of ribbon to ty around the top.  I tie a double bow and snip the ends into a V.  I punch a hole in the initial tag and tie the ribbon (about 2 feet) through the top ribbon and tie with a single bow.


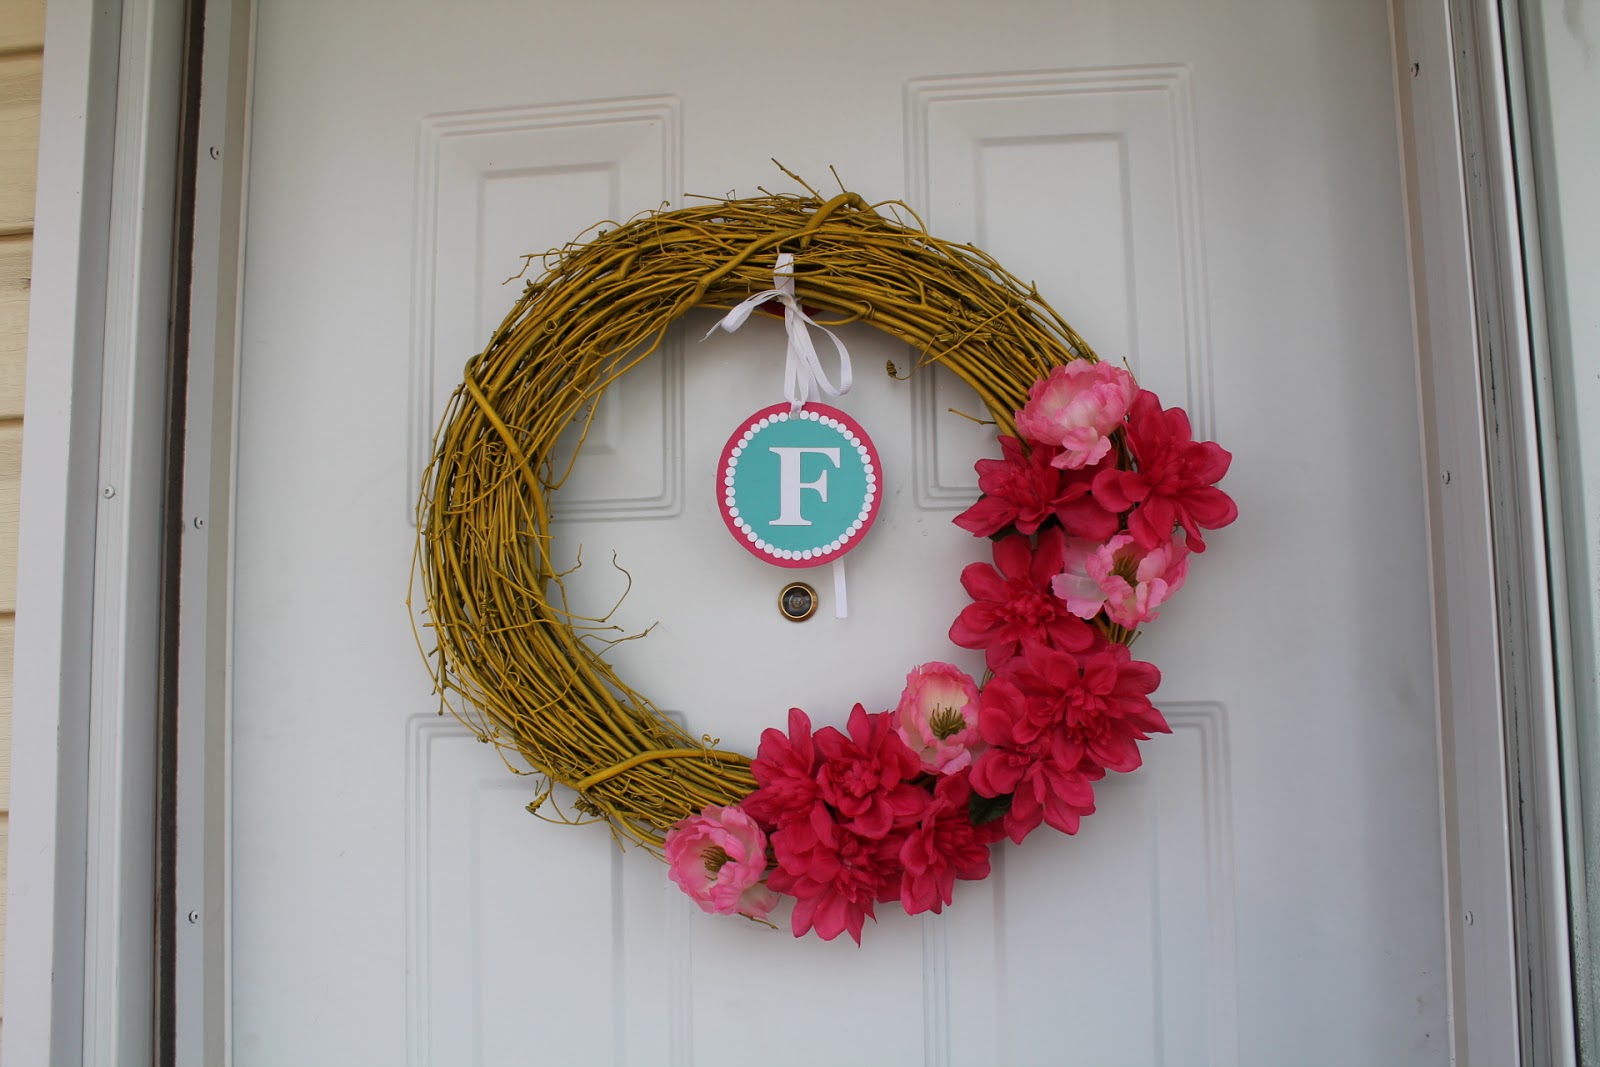
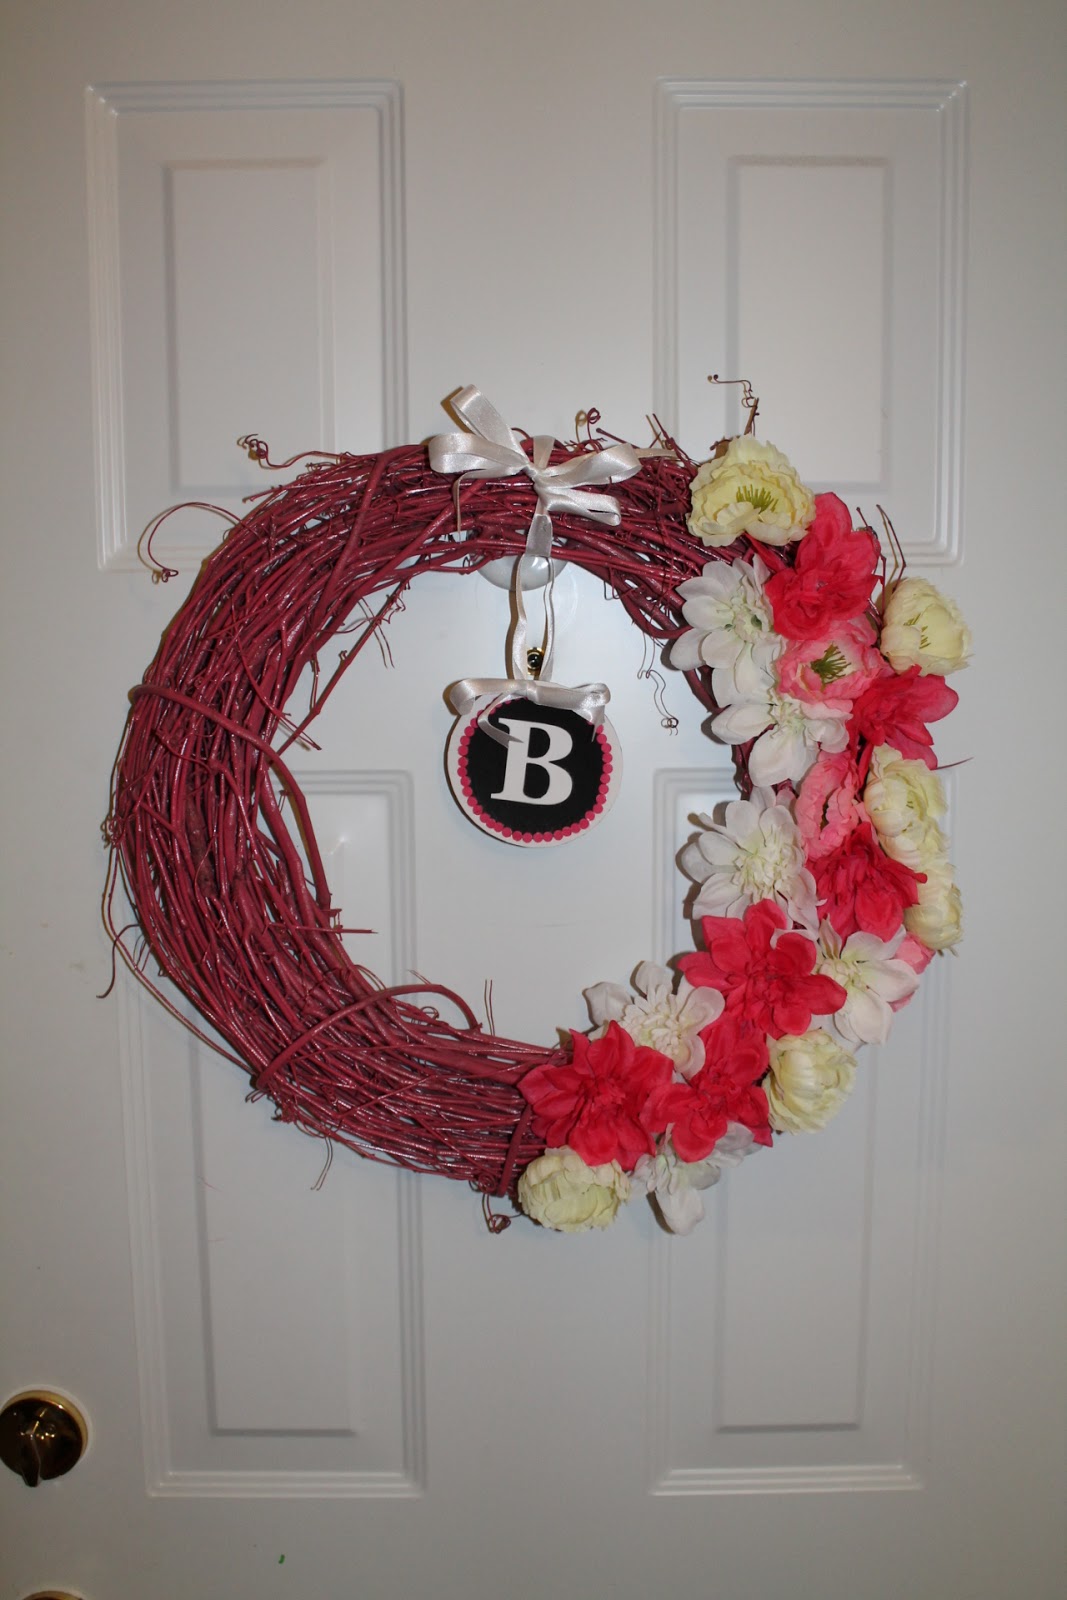
Here are a few of the more unique designs that I've made.  It was fun to have people make requests and get to be a little creative with designing.  The possibilities are endless.  There maybe be fall wreaths in the future.


With a Barrel and a Heap of Crafting Fun,

Stephanie

Another shout out to Gail for the original inspiration - http://boutiqueginabeana.blogspot.ca/2011/03/birthday-gift.html

Check out my sister-in-law's blog about our crafting time - The Yellow wreath with "F" is hers
http://www.blessedlifeatopacakestand.com/2013/04/sunny-spring-wreath.html

Tuesday 2 April 2013

If something works - use it!

I am needing to retract a statement from my post yesterday about not cleaning with chemicals.  I was doing spring cleaning at my church today and was given the most fabulous tip.  And if something works, I am going to use it!

To cut grease, specifically on a kitchen range hood, use an ammonia based glass cleaner.  It doesn't have to be brand specific, but the stuff I used was blue and it had ammonia.  It cut through the grease like nothing.  I had cleaned this same hood last year and scrubbed and scrubbed with everything I could think of, even SOS pads.  I was so excited about this discovery that I said, it has to be on Pinterest.  So here it is.


I am going to have to go and buy me some of this now.

I also thought it ironic that I was just stating that I don't "spring clean" my house but I do at church.  Well, if there is a need, I will usually step up.  It does make me want to dig a little deeper this week to get some of my hidden stuff clean, but I think for my sanity and physical well being, I will stick to the clean as the need arises technique.  

It did come up in conversation as a bunch of us women were scrubbing away, that back in the day, moms might have had clean houses, but these women don't remember their moms reading them a book or helping their moms bake.  So again, it's all about balance.

With a Barrel and a Heap of cleanliness,

Stephanie

Monday 1 April 2013

A Discourse on Cleaning, Organizing and Decorating

I am in the "mother of young children" stage of life.  What does that have to do with cleaning, organizing and decorating?  Well, everything in fact.  I have found after being a mom for 6 years that in order to keep one's sanity, there must be compromise on one's previous standards and expectations.  When I had new babies, I would sit in my chair in the living room and look across our open concept home and see nothing but dusty and streaky floors.  I would then obsess about it the whole time I was nursing and then anxiously try to work it in to my day to clean said floors.  I think on average I would clean my floor every other day when I had 1 or 2 kids.  I now clean my floors once a week (on a good week).  This may sound like an excuse, or a cop out, but in my reality it has been a blessing.  I see it as a blessing that I clean less because it also means that I interact with my kids more and we "live" in our house, rather than have it as a show home.  


However, I do enjoy a clean, organized and decorated house.  So how do I find balance?  Well, I think it starts with having a clean house.  What's the point of having a nicely decorated home if you can't keep it clean?  Here are a few of my tried and tested cleaning tips.  I don't use chemicals.  I like to use things that are safe for my kids to be in the same room as me while I'm cleaning without risk of poisoning them or them choking on fumes.  I only clean with vinegar and water or a store bought green cleaner and have never had terribly sick kids.  I clean my toilets with a big splash of vinegar and a big shake of baking soda - let it foam and then clean with a brush.  I have also (FINALLY) found the best floor cleaner for my laminate is a combination of 1/4 vinegar, water and a couple TBSP of rubbing alcohol.  The rubbing alcohol makes the floors dry really fast and they are not streaky.  
 
After you have a cleaned, if you a still have time, and acknowledged that it won't get done all in one day, it is important to organize.  I believe that everything should have a home and if it doesn't, find one, or get rid of it.  This becomes increasingly hard as you have more kids and they start bringing papers and art work home from school.  This has caused me great anxiety in the past.  However, now with one in Kindergarten and one in Preschool, I feel like I have a pretty good system for organizing, which gets it off my kitchen table.  We bought this Expedit unit at Ikea and put it in the corner of our dining room which is my "Grand Central Station" for running my home. 

I keep things like lunch kits and camera bags behind the closed doors, our Bible and kid's Bibles are on the top for handy access for after meal readings.  Notice one binder labelled Family Organization Binder?  That might be a future post, but basically it has important information about our family, emergency info, babysitter instructions, school schedules, meal ideas and take-out menus, sick kids guide, cleaning tips and other miscellaneous papers that have a home in one convenient place.  There is also a purple binder there which is for the baby.  I have one small binder for each kid that has their first year calendar, a pocket page for important documents such as birth certificates and swimming lesson report cards, and a pad of paper to jot down what they've been doing as they grow.  I also bought this cube organizer at Staples that helps to divide my papers from the kid's papers and has drawers for pencils and such.  This whole unit was a bit of investment but has been a huge relief for me in the organization department.  I realized that I have about 5 different places in my house where I keep arts and crafts supplies and that this should be consolidated somehow, but that will be a future project.  

On the side I have my super Mom's planning calendar and a white board for remembering prayer requests and kid's memory verses.

As another way to control kid's papers, we put up a cork board on a blank wall in our dinning room, so the kids art can be displayed without taping in all over the house.  I usually take pictures of their art and then "recycle" it and put up the new stuff so I don't keep too much.


I have also found that rather than "spring-cleaning", I clean as the need arrises and starts to bug me, or I make a list of things to clean/organize and then allow myself to do one a day so that I don't get obsessive and ignore my kids for a whole day while taking on too much.  This being said, I still sometimes see all the needs at once and try to tackle too much; you know how one thing leads to the next; but I'm trying.  I read once that cleaning with young kids is like shoveling snow while it's still snowing - so true!

And finally, on decorating.  I wouldn't say I have a specific "style" so to speak, however I generally decorate with things that I like and make me happy, with input from my husband who happens to have a great eye and is kinda crafty too.  I think when it comes to decorating for a home with young kids that it's important to be practical in your approach.  Find a balance between form and function.  This doesn't mean that you can't have nice things, but I wouldn't put a lot of breakable stuff at a crawling babies level.  Of course, that's obvious.  But having a soft ottoman instead of a coffee table, or dinning room chairs with slipcovers that can be washed (regularly).  When purchasing furniture we went with stuff we liked, but that isn't so expensive that it can't be jumped on used (come on, we know it happens). 

I like to be able to change up my decor a bit according to the seasons.  Something simple like a wreath can really brighten things up.  

However, I don't like to store a whole bunch of seasonal decor so I try not to go over board.  It helps to go to a place like a garden center after Christmas when everything is 50% off or Michaels when they have eveything 15% off including sale items.  We've done well for art and such at Winners too.

Family pictures have always been important to me, so we make a presence for them in our home.
  

This arrangement was so easy with a template from Michaels.  I am not one to be afraid to make a hole in the wall.  If it's not level, I try again; holes can be patched.

We had to rearrange our living room (even buying new couches) to work with a second hand piano.  No one in the house plays (yet) but we look forward to our kids taking lessons.  For now it is a place to display (and collect dust).

I have also tried to decorate my kids rooms in ways that are special and functional.  

I know that this is not necessary, but I like to do it and they love their rooms.  However, we have not yet decorated our room, which is supposed to be a sanctuary right?  Well, that's on the to do list.

One more thing that I want to share before this gets too long.  Our electrical panel is in our daughter's bedroom and we wanted to cover it in a functional, accessible and attractive way.  We bought a mirror that was the right size and my husband put hinges on it.  
So there is no unsightly electrical panel, yet it is easily accessible.  Great idea right?!

We don't have a large home, and we have to build a garage so we can stop using our relative's garage to store our stuff.  But I think we have made the most of the space and we will be able to live here in comfort for a few more years to come.  It's amazing that when we moved in to our house 6 years ago that we said it would be our 5 year home and now we have no plans to move.  

With a Bushel and a Peck of Hominess,

Stephanie